Creating a Dragster activity 1/3
Here we will be using Dragster 2.0
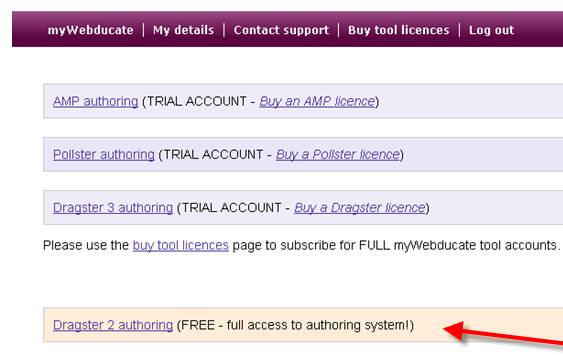
- Once logged into the site on a you will be greeted by this screen.
After selecting the Dragster 2.0 the Dragster activity interface will look like this -
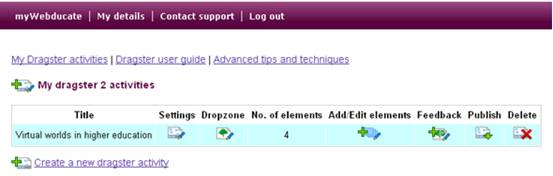
The 'My Dragster 2 activities' list is the main interface to adjust, manage and export your activity.
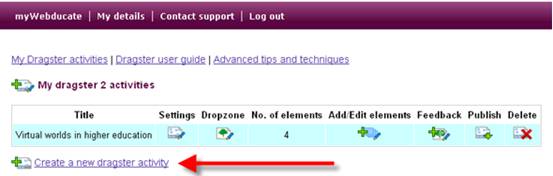
- You can start by clicking 'Create a new dragster activity'.
Dragster activities come in two main varieties -
- Image labelling activities
- Classification activities where elements are dragged on to a table or matrix
Both these activities enable feedback on the allocation of labels and elements. An example of an activity can be found here.
- We will be creating an activity based around labelling of the University of Bristol's presentation template. So once we select to 'Create a new dragster activity' we will then need to fill in the preliminary details. Like so -
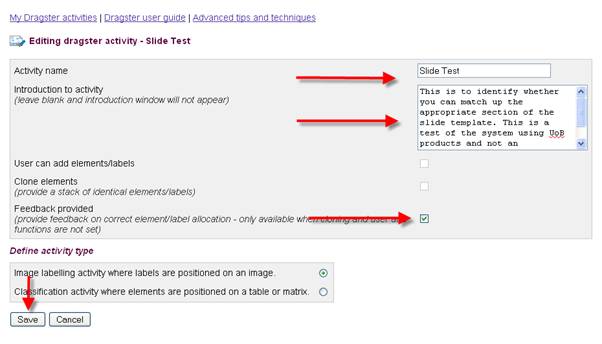
Handily the system has a spellchecker functionality to highlight any mistakes in the introduction. This introduction is not mandatory but is a good space to set out the parameters of the assessment.
- Once saved your activity will appear in your list of activities, you will then be prompted to then define the drop zone.