Creating using Timeline 2.0 2/2
The Synchonizing screen, which is item 3 of the authoring management screen (the screen that you first come to in your project), is the part of the site where you construct your learning object.

If we select to access this page we can start to build our timeline.
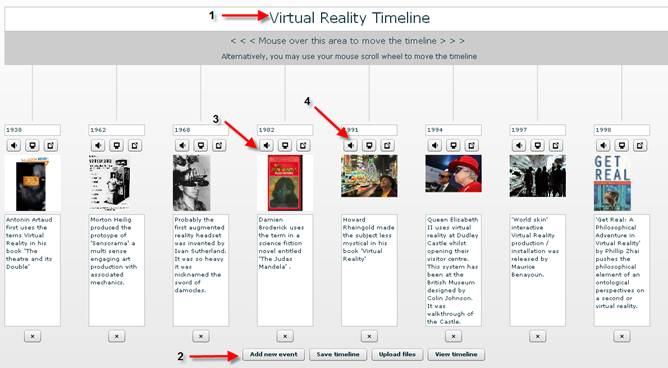
The picture below is labelled with 4 sections these denote as follows -
- The area where you can enter the title of your project
- Each point on the timeline represents an event these are manipulated by dragging and dropping and produced using this button.
- To link a specific image to be displayed with an event on the timeline click with this area. A small amount of text is added to describe and explain each point on the timeline in the text box below..
- The multimedia icons of each above event allow you to add a date, video content, a hyperlink etc. These are linked through each events incorporated icons but the filing structure is managed by the previous screen.
WARNING! To enact changes please 'Save timeline' before leaving this screen. Otherwise progress will be lost.
After completing your timeline save your progress and you can view the timeline or click on upload file to obtain the hyperlink to embed your project in Wimba Create. Then to embed the file in your project please continue to the next section.