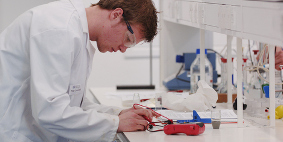
In more hands-on educational settings TEL can be used in a range of ways such as: preparing students to make the most of sessions; exposing them to simulated versions of hard-to-access resources, environments and equipment; supporting field and lab work in-situ.
Whether the aim is to prepare students for physical labs, so they can make the best of their lab time, or to help them learn something they can't easily access in a lab, there are several options for content you can include in your course. Variations of these have been successfully used for several years in the Dynamic Lab Manuals (DLM) offered in several of the University's STEM Schools, e.g. Chemistry. If you are planning to use resources you haven't created yourself, make sure you have a licence to do so.

We can help you develop ideas you have for improving practical sessions using technology. Contact us with your questions or potential projects.
| Content type | Aim | Tools & Methods | Considerations |
|---|---|---|---|
| Photographs of equipment, or images of theoretical models | Help students get familiar with equipment or visualise what is happening. | If the aim is to show students where the different parts of the equipment/model are, you can add labels and arrows. You can do this easily with PowerPoint and then save the slide as a picture. |
Images need alternative text that describes what it is showing, or what students need to understand from it, for accessibility. You can add this in Blackboard Ally once you have uploaded the image in your course. |
| Videos / Interactive videos | Help students understand how to use a piece of equipment, how to perform an experiment or, if interactive, how various decisions may affect the results. | You can film with a camera (check if your School can make one available) or with your mobile phone. usually one person will need to film while another performs the experiment. You can import and edit the clips in Camtasia and export the final video. See the workflows for interactivity and making the video available to students. | If the video includes audio explanations, it will need captions, added either within Camtasia or on Replay. If it doesn't, you will need to add written text to accompany it, explaining what you are doing and why. |
| Animations/ interactive simulations | Help students understand processes, design or practice experiments in a safe environment. | You can look at whether there is an existing resource you can use, either in different courses within the University, or available elsewhere (e.g. look at suggestions in Lab work alternatives (Word), Moving science labs online, lab/simulation resources). If you need to create a new one, contact us for advice. |
These often take a long time to create, so plan ahead. Accessibility of these resources varies and often needs to be assessed and adjusted on a case to case basis. Sometimes an equivalent text alternative will need to be provided. |
| Quizzes and exercises, other interactive materials | Help students check their retention and understanding and apply their skills. This can be while they are learning, or as a test to check if a student has learned the prerequisites for going to the lab. | You can create some interactive materials, e.g. decision trees, with Xerte. You can create quizzes with Blackboard or Xerte to embed in your course's learning materials. Blackboard tests can be used for a final summative assessment, e.g. Health & Safety. | Images included in interactive materials and quizzes will need alternative text to describe what they are showing. If other media is included, it will also need accessible alternative formats. |