Set up your new macOS computer
Before you begin
There are a few things you will need before you set up your new macOS:
- You will need to have your computer plugged into power.
- You will need access to the internet. Do not attempt setup without internet access.
- For the moment, setup must NOT be done on our Eduroam wireless network. Please either take your device home to complete the setup or arrange with your local support team to be setup with a working wired network connection.
- You can also visit the IT Counter in the Arts and Social Sciences Library for help setting up your new Mac.
Set up your macOS device
1. Regional settings
- You will be prompted to select your Country or Region. Please select United Kingdom and press Continue.
2. Written and Spoken Languages
- Here you can select your preferred written and spoken language settings. The defaults include an English (UK) keyboard layout and English (United Kingdom) dictation settings.
- To change these settings, click ‘Customise Settings’ in the bottom left-hand corner. Otherwise, select Continue.
3. Accessibility
The Accessibility screen presents you with four features which you can enable to enhance your experience. These settings can be enabled here or later in System Settings.
- Vision – Click on the vision icon to enable VoiceOver.
- Motor – Click on the motor icon to enable the Accessibility Keyboard.
- Hearing – Click on the hearing icon to enable Closed Captions
- Cognitive – Click on the cognitive icon to choose whether to have a light or dark appearance for your windows and applications.
Once you have selected the correct settings, select Continue to proceed.
4. Connect to the internet
- Off-Campus. If you have access to a wired connection at home, please use this instead of wi-fi. It will provide the most stable connection and the best experience. If you only have wi-fi available, connect to it when presented with a list of available connections. Please make sure you are close to your wireless router so that you have the best possible connection.
- On-Campus. We are currently not able to complete the MacOS setup on Eduroam wifi, so you may need to take your device home to complete setup or arrange with your local IT support team to provide a suitable wired network connection. We are working on making this process more seamless and hope to have an On-Campus solution ready soon.
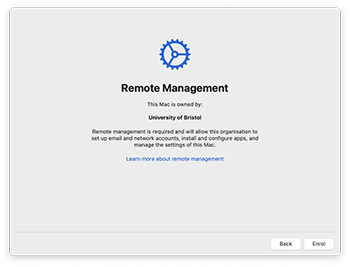
5. Remote Management
- This screen will note the device is owned by the University of Bristol.
- Click Enrol to proceed with your device’s configuration.
- The device will now configure itself; this will take a few minutes.
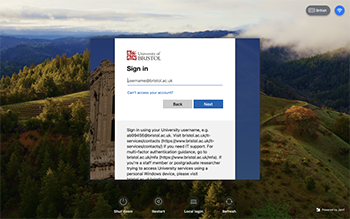
6. Sign in to your computer
- Once configuration is complete, you will be presented with a sign-on screen. This screen will have the University of Bristol logo in the top left-hand corner.
- Please sign in with your University username and password.
7. After login: installation and restart
- A few moments after completing sign in, you will be presented with the desktop and the Self Service application will open.
- Provided you still have a network connection the Microsoft Office applications will install in the background. This make take 10 - 15 minutes or longer depending on your connection speed. Once installation has completed you should see office apps such as Microsoft Word appear in the Applications folder.
- After installation, restart your device and make sure you can boot your device and sign in.
8. Once you have restarted your computer, you need to register your macOS for compliance following the guidance.
- After this registration process is complete, we recommend you open and sign into some services to check all is working as expected:
- Microsoft Teams
- Microsoft Word
- Microsoft OneDrive.
The setup of your device is now complete and you can now begin using your computer.
Working on Campus
As we are unable to use the Eduroam network at the login screen, you may be prompted to log in locally when on campus, this is fine to do, please use your username without the @bristol.ac.uk. You will be able to join and use the Eduroam network once logged on.
Further information can be found at Logging into your macOS computer (staff and students only).
Installing software
You can install software can be installed using the Self Service app, which can be found in your Applications folder. Most apps are available immediately through the Self Service app. Some apps will require you to log in first.
Please click the ‘Login’ button in the bottom left corner of the window and log in with your University credentials to see the full list of software available to you.
You can find more information about the Mac Self Service software on SharePoint (staff and students only).
Local admin rights
There are times when you may temporarily need local admin rights to install software or configure your computer. If you require temporary admin rights on your computer, please read the information on SharePoint (staff and students only) and raise a request following the instructions on the information page.
An approved request gives you the ability to temporarily elevate your rights to the admin level. Granting temporary admin rights instead of permanent admin rights gives the University higher levels of security and lower levels of risk.