E-book writer Part A: Producing eBook
From Stat-JR’s webtest interface, you can now produce an eBook which contains all the details of your current webtest session. This can then be imported into Stat-JR’s eBook-reading interface, greatly speeding-up the eBook-writing process.
Here we work through an example of building an eBook in webtest, importing it into Stat-JR’s eBook-reading interface, and making some simple edits; for further details on how to read, edit and author eBooks, see the eBook interface users’ guide.
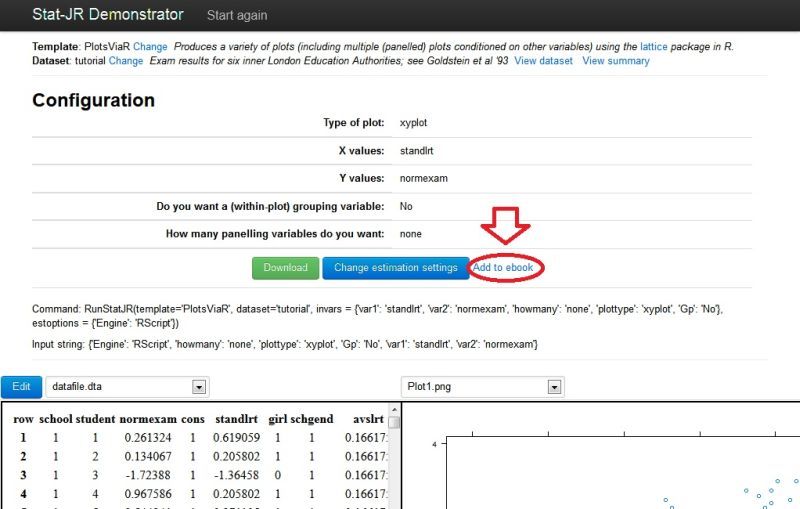
In the latest version of webtest, you’ll see that an ‘Add to ebook’ link now appears (see below) once you have chosen a template and dataset, entered your inputs, and pressed the final run button which appears beneath; here we’ve used the PlotsViaR template to plot normexam against standlrt from the tutorial dataset.
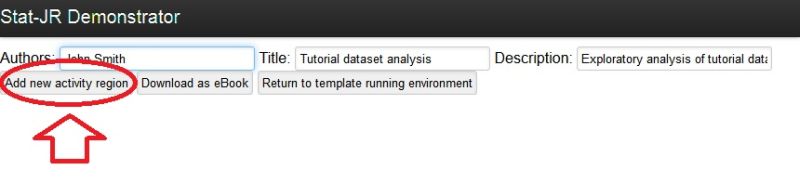
On pressing this link you enter a page (below) in which you can start to build your eBook.
You first see, at the top, an opportunity for you to enter:
- the eBook author name;
- the title of the eBook;
- a description of the eBook.
These will all appear on the main page of Stat-JR’s eBook-reading interface (and, by default, the eBook title will also appear as a running title at the top of the pages within the eBook as well).
Beneath that are three buttons; the last allows you to return to the template-running environment you have just emerged from (specifically the main page of webtest; to return to the results of the last execution, simply press the ‘page back’ button in your browser). The first button (‘Add new activity region’) allows you to start building your eBook. If you press this, you will be taken to the screen below.
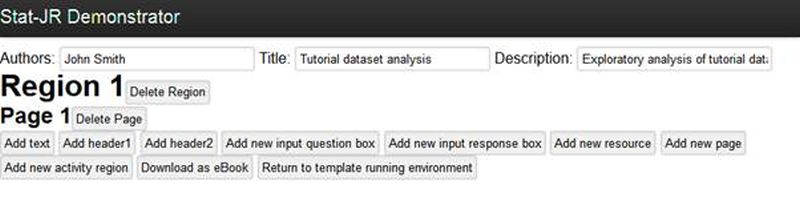
If you now add a new eBook page, as indicated above, you can then choose what you would like to include in that page (see below):
- Add text:adds a paragraph of text, i.e.:
<p>like this</p>
- Add header1:adds highest-level (1) header, i.e.:
<h1>like this</h1>
- Add header2:adds level 2 header, i.e.:
<h2>like this</h2>
-
Add new input question box: this will produce the html div tag which prompts the eBook reader to provide input to run the execution. However, since we have just specified, in webtest, all inputs necessary to run a template, the input question box won’t actually appear in our eBook (input question boxes only appear if there are outstanding inputs) unless we make a simple adjustment to the outputted eBook files (see below).
-
Add new input response box: this lists all the inputs with values specified (and is updated as the eBook reader responds to any input question box).
-
Add new resource: this allows you to choose an outputted file, from the template execution, to include in your eBook. Once pressed, a drop-down list appears above with all available files (e.g. plots, results, equations, scripts, etc.)
-
Add new page: starts a new eBook page.
Here we’ve chosen, in turn: header 1, header 2, an input question box, an input response box, header 2, and the resource Plot.png; having done so, we return to the template-running environment, as indicated:
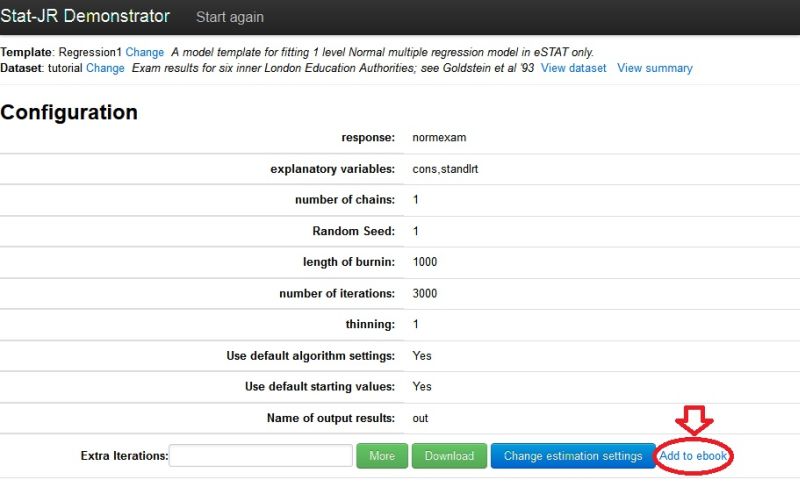
Back in the template-running environment, we have chosen a different template (Regression1), and specified the following inputs, regressing normexam on standlrt. After doing so, we press the ‘Add to ebook’ button once more, as indicated:
Back in the eBook-building window, we now add, in turn: header 1, header 2, text, an input question box, an input response box, header 2, the resource equation.tex, header 2, and finally the resource ModelResults. After doing so, we choose to Download the eBook, as indicated:
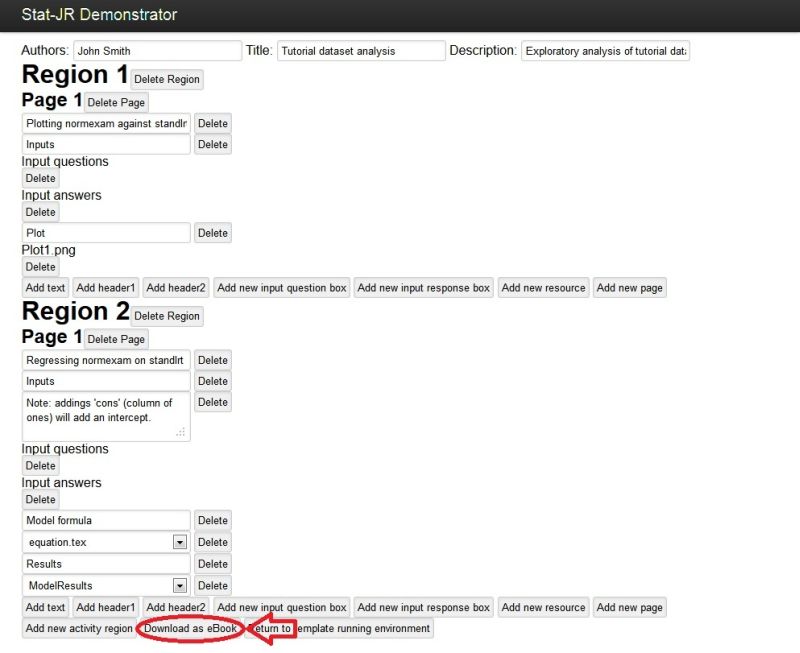
If we then save the eBook, when prompted (e.g. to Stat-JR’s ‘ebooks’ folder), we can open Stat-JR’s eBook-reading interface, and import our eBook (as a zip file).
Move on to eBook Writer Part B: Importing the eBook
Back to New features.